

Subtotal $0.00


Table of Contents
- What a Brake Service Actually Includes
- Signs of Bad Brake Pads You Should Never Ignore
- How Long Do Brake Pads Last?
- What Affects Brake Pad Replacement Cost
- The Brake Inspection Process: What Technicians Check
- Brake Fluid, Calipers, and the Hydraulic System
- DIY vs. Professional Brake Service: Which Makes Sense?
- How Brake Systems Differ by Vehicle Type
- Frequently Asked Questions
Last Updated: September 28, 2026
What a Brake Service Actually Includes
A brake service is a comprehensive inspection and maintenance procedure that evaluates your vehicle’s entire braking system, from the pedal you press to the friction material that stops the wheels. At TIPS Automotive, we treat brake service as more than a pad swap. It covers hydraulic components, electronic sensors, and the hardware that holds everything together. A proper brake service typically includes a road test, a visual inspection of pads and rotors, a check of brake fluid condition, and a caliper function test. The goal is simple: confirm your vehicle can stop safely and predictably in every condition.
From Inspection to Test Drive
A complete brake service follows a defined sequence. First, the technician verifies your complaint by test-driving the vehicle and listening for noise or feeling for pedal pulsation. Next, the wheels come off for a hands-on inspection of pad thickness, rotor condition, and caliper operation. Fluid level and color get checked, and the technician examines brake lines for leaks or corrosion. Finally, after any repairs, the vehicle goes back on the road for a second test drive to confirm the fix.
Many drivers assume brake service means new pads and nothing else. That assumption leads to comebacks and, worse, unsafe stops. A thorough brake service looks at the whole system because a caliper that drags or a fluid that has absorbed moisture will ruin new pads in short order.
Key Takeaway
A complete brake service covers pads, rotors, calipers, fluid, lines, and hardware. Skipping any of these means you are treating a symptom, not the system.
A complete brake service covers pads, rotors, calipers, fluid, lines, and hardware. Skipping any of these means you are treating a symptom, not the system.
Signs of Bad Brake Pads You Should Never Ignore
The most common signs of bad brake pads are squeaking, grinding, a soft or spongy pedal, vibration during braking, and a dashboard warning light. Any one of these means you should schedule a brake inspection promptly. Squealing usually indicates the wear indicator is contacting the rotor. Grinding means metal-on-metal contact and almost always requires rotor replacement alongside new pads.
Vibration through the pedal or steering wheel points to rotor thickness variation or warping. A pedal that sinks toward the floor suggests a hydraulic problem, possibly air in the lines or a failing master cylinder. Pulling to one side during braking often traces to a sticking caliper. None of these symptoms improve on their own.
Warning Light Diagnostics
A brake warning light on your dashboard is not a suggestion. It is a direct signal that the system has detected a condition requiring attention. The light can indicate low fluid, a engaged parking brake, an ABS fault, or a failing sensor. Do not assume it is a glitch. Have it diagnosed with a scan tool that reads ABS codes, because a standard engine code reader will not see them.
If the ABS light comes on alongside the brake light, the anti-lock braking system has logged a fault. ABS still allows normal braking, but you lose the anti-lock function during emergency braking. That matters on wet or loose surfaces. A qualified technician can pull the specific code and test the wheel speed sensors, the hydraulic unit, and the wiring.
How Long Do Brake Pads Last?
Brake pads typically last between 30,000 and 70,000 miles, depending on driving habits, vehicle weight, and pad material. City drivers who brake frequently often replace pads closer to the 30,000-mile mark. Highway commuters who rarely touch the pedal may reach 70,000 miles or more. There is no universal number, which is why mileage alone is a poor service trigger.
Pad material plays a role too. Ceramic pads tend to wear more slowly and produce less dust, while semi-metallic pads offer stronger initial bite but wear faster and generate more noise. The only reliable way to know your pad life is measurement. A technician measures the friction material remaining and compares it to the minimum specification.
Brake Component Longevity Factors
Several factors shorten or extend brake component life. Driving style tops the list. Aggressive braking, riding the pedal downhill, and tailgating all accelerate wear. Vehicle weight matters as well. A loaded SUV or light truck puts more demand on pads and rotors than a compact sedan. Towing adds even more heat and stress.
Environmental conditions also play a part. Stop-and-go traffic generates heat cycles that warp rotors over time. Road salt and moisture corrode brake lines and calipers. Even the quality of the parts installed matters. Budget pads may wear unevenly or produce noise within a few thousand miles. Investing in quality friction material and having a professional technician verify the installation protects your stopping power.
Watch Out
Ignoring a grinding noise to “get a few more miles” out of your pads usually turns a pad replacement into a pad-and-rotor job. The extra cost is entirely avoidable.
Ignoring a grinding noise to “get a few more miles” out of your pads usually turns a pad replacement into a pad-and-rotor job. The extra cost is entirely avoidable.
What Affects Brake Pad Replacement Cost
Brake pad replacement cost depends on your vehicle type, the quality of parts you choose, and whether the rotors need resurfacing or replacement. Labor rates vary by shop, and luxury or performance vehicles often require more expensive components. The number of axles being serviced also changes the total. Front brakes typically wear faster than rear brakes, so many drivers only service one axle at a time.
Because pricing varies so widely, we do not publish flat rates at TIPS Automotive. Instead, we provide a written estimate after inspecting your vehicle. That way you know exactly what your car needs and why, before any work begins. If you have been burned by vague quotes in the past, ask for a breakdown of parts and labor. A shop that will not provide one is a shop worth avoiding.
| Factor | What It Changes | Why It Matters |
|---|---|---|
| Vehicle type | Parts size and cost | Trucks and performance cars use larger, pricier components |
| Pad material | Wear rate and noise | Ceramic costs more but lasts longer and runs quieter |
| Rotor condition | Resurface vs. replace | Warped or thin rotors must be replaced, not resurfaced |
| Axles serviced | Total labor and parts | Front-only service costs less than all four wheels |
| Shop labor rate | Hourly charge | Independent shops often charge less than dealerships |
The Brake Inspection Process: What Technicians Check
A brake inspection is a systematic evaluation of every component that contributes to stopping power, and the best shops follow the same sequence every time so nothing gets skipped. The technician removes the wheels, measures pad thickness at the inboard and outboard positions on each caliper, checks rotor thickness and surface condition, and tests caliper movement. Brake fluid is examined for moisture and contamination. Lines and hoses are inspected for cracks, leaks, and corrosion. The parking brake mechanism is also verified.
Here is the component-by-component checklist a thorough inspection follows:
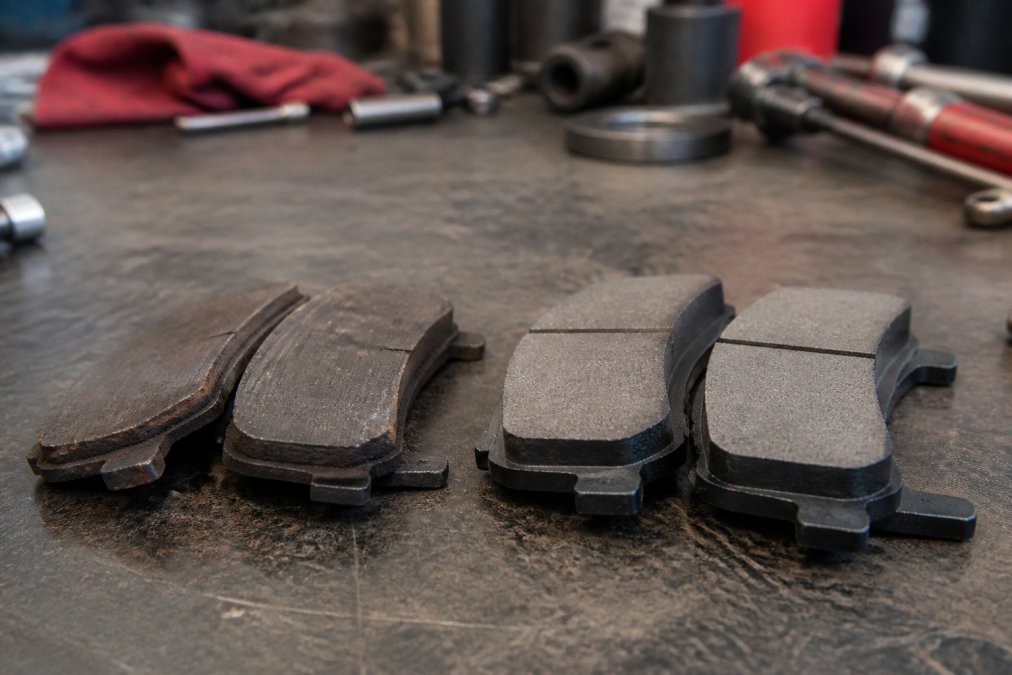
- Pads: Friction material measured in millimeters and compared to the wear-indicator threshold. Most pads start around 10-12 mm and are typically due for replacement near 2-3 mm. Uneven wear between inboard and outboard pads points to a sticking caliper or a seized slide pin.
- Rotors: Thickness measured with a micrometer at multiple points around the disc and compared to the minimum thickness stamped on the hub. Surface checked for scoring, heat cracks, and blue spots that indicate overheating.
- Caliipers: Piston travel tested, slide pins checked for free movement, boots and seals inspected for tears or fluid weeping.
- Brake fluid: Tested with a moisture meter or test strips. Fluid that reads above roughly 3% moisture, or that has turned dark amber, is due for an exchange.
- Lines and hoses: Flexible hoses checked for cracking or bulging under pressure; hard lines checked for rust and seepage at fittings.
- Hardware: Anti-rattle clips, shims, and abutment surfaces checked for corrosion and lubricated where specified.
- Parking brake: Cable travel, shoe condition on drum-in-hat systems, and electronic parking brake function verified.
- Road test: Before and after, to confirm the complaint and verify the repair.
Rotor Thickness, Resurfacing, and Replacement
Rotors have a minimum thickness specification stamped on the hub. Once a rotor wears below that number, it must be replaced, not resurfaced. Resurfacing removes a thin layer of metal to create a smooth, parallel surface, but it also reduces thickness. If the rotor is already near its minimum, resurfacing pushes it out of spec and creates a safety risk.
Technicians measure rotor thickness with a micrometer at multiple points around the disc. They also check for lateral runout, which is side-to-side wobble that causes pedal pulsation. If runout exceeds specification, the rotor is replaced. This is why a brake service that skips rotor measurement is incomplete. You can install the best pads in the world, but they will not stop a warped rotor from pulsing.
Warning Light Diagnostics: What Each Light Actually Means
Dashboard brake lights are not interchangeable, and treating them as one generic warning is a common and costly mistake. Here is how to read them:
- Red BRAKE light (solid): Usually the parking brake is engaged or brake fluid is low. Check the parking brake first; if it is released and the light stays on, check the fluid reservoir and look for a leak before driving.
- Red BRAKE light (flashing): On many vehicles this indicates a serious hydraulic fault or a distribution block issue. Stop driving and have the vehicle towed.
- Amber ABS light (solid): The anti-lock system has logged a fault. Normal braking still works, but you lose anti-lock function during emergency stops, which matters most on wet, icy, or loose surfaces.
- Amber ABS light (flashing): The system is actively intervening, or a wheel speed sensor is dropping signal intermittently. Have it scanned.
- Amber BRAKE or (!) light with a circle: Typically the parking brake or brake fluid level sensor on vehicles that separate the two indicators.
- Traction control or stability control light on with ABS: Often the same root cause, a wheel speed sensor, tone ring, or wiring fault shared between systems.
A standard engine code reader will not see ABS codes. A scan tool capable of reading the ABS module is required to pull the specific fault, after which the technician can test the wheel speed sensors at each corner, the hydraulic control unit, and the associated wiring. Clearing the light without diagnosing the code is not a repair.
Key Takeaway
A real brake inspection produces numbers, pad thickness in millimeters, rotor thickness versus the stamped minimum, and fluid moisture percentage, not just a visual glance. Ask for those measurements.
A real brake inspection produces numbers, pad thickness in millimeters, rotor thickness versus the stamped minimum, and fluid moisture percentage, not just a visual glance. Ask for those measurements.
Brake Fluid, Calipers, and the Hydraulic System
Brake fluid is the hydraulic medium that transfers force from your foot to the calipers. Over time, it absorbs moisture from the air, which lowers its boiling point and promotes internal corrosion. Most manufacturers recommend a brake fluid exchange at specific intervals, often every two to three years. Fresh fluid maintains consistent pedal feel and protects the master cylinder, brake lines, and ABS components.
Calipers are the clamping mechanisms that press the pads against the rotors. A caliper that sticks will drag, overheat the pads, and pull the vehicle to one side. Caliper slides and boots should be cleaned and lubricated during a brake service. If a caliper piston is seized or the seals are leaking, replacement is the only safe option.
The hydraulic system as a whole depends on every component working together. The master cylinder generates pressure, the lines carry it, and the calipers apply it. A leak anywhere in that chain compromises your ability to stop. This is why a complete brake service includes a pressure test and a visual inspection of every line and fitting.
DIY vs. Professional Brake Service: Which Makes Sense?
Most brake service pages either push you straight to a shop or wave vaguely at “safety” without telling you where the line actually sits. Here is a transparent breakdown of what a competent home mechanic can realistically handle, what requires professional equipment, and how to decide.
Jobs That Are Reasonable for a Prepared DIYer
- Pad replacement on a conventional sliding-caliper system. The procedure is well documented, the parts are widely available, and the main risks are procedural: compressing the caliper piston correctly, not twisting the piston boot, and torquing every fastener to spec.
- Rotor replacement (not resurfacing). Swapping a rotor is a bolt-on job on most vehicles. What you cannot do at home is machine a rotor to a precise parallel surface, that requires a brake lathe.
- Brake fluid top-off. Checking the reservoir and adding the correct fluid type (DOT 3, DOT 4, or DOT 5.1, never DOT 5 in an ABS system) is straightforward.
Jobs That Require Professional Equipment or Training
- Brake fluid exchange. A proper flush pushes old fluid out of the ABS hydraulic unit and lines under pressure. Doing this wrong can introduce air into the ABS module, which often requires a scan tool with an automated bleed function to clear.
- Rotor resurfacing. Requires a brake lathe and the knowledge to measure runout before and after. On-vehicle lathes exist but are shop equipment.
- ABS diagnosis and repair. Reading and interpreting ABS codes, testing wheel speed sensors, and servicing the hydraulic control unit require a scan tool and wiring diagnostics.
- Caliper replacement or rebuild. Bleeding a new caliper correctly, verifying no leaks under pressure, and confirming pedal feel is a skill that takes practice.
- Electronic parking brake service. Many newer vehicles require a scan tool to retract the rear calipers into service mode before pad replacement. Skipping this step can damage the caliper motor.
- Any hydraulic leak diagnosis. Tracing a soft pedal to a master cylinder, proportioning valve, or line fitting is diagnostic work, not parts swapping.
The Real Cost-Benefit Math
DIY saves the labor portion of the bill, but it shifts the risk of a comeback onto you. The two most common DIY failure modes are under-torqued caliper bolts (which can back out) and over-torqued lug nuts (which can warp rotors and stretch studs). Both are avoidable with a torque wrench and the factory spec, which is why a torque wrench is the single most important tool purchase for anyone considering home brake work.
A few other trade-offs worth weighing honestly:
- Time: A first-time pad-and-rotor job on one axle often takes a home mechanic two to three times longer than a shop, especially if a caliper piston will not compress or a rotor is seized to the hub.
- Warranty: Parts bought at retail usually carry a manufacturer warranty, but labor is on you if a defect appears. Shop-installed parts typically carry a labor warranty as well.
- Resale and records: A documented professional service history is easier to hand to a buyer than a verbal account of your own work.
- Diagnosis: If you are not certain what is wrong, DIY parts-swapping is the most expensive way to guess. A diagnostic fee at a shop is often cheaper than the second set of pads you buy after the first set does not fix the noise.
A reasonable rule of thumb: if the job is pad or rotor replacement on a conventional system and you have the tools, the torque specs, and a safe way to lift the vehicle, DIY is defensible. If the job involves hydraulics, ABS, electronic parking brakes, or an unclear diagnosis, professional service is the better call.
Pro Tip
If you plan to do your own brake work, buy a torque wrench and use it on every caliper bolt and lug nut. Over-torqued and under-torqued fasteners are two of the most common causes of brake-related comebacks.
If you plan to do your own brake work, buy a torque wrench and use it on every caliper bolt and lug nut. Over-torqued and under-torqued fasteners are two of the most common causes of brake-related comebacks.
Watch Out
Never let a caliper hang by the brake hose. The hose is not designed to support the weight, and internal damage can cause a restriction that is difficult to diagnose later.
Never let a caliper hang by the brake hose. The hose is not designed to support the weight, and internal damage can cause a restriction that is difficult to diagnose later.
How Brake Systems Differ by Vehicle Type
Brake systems are not identical across vehicle types. A compact sedan uses smaller rotors and lighter calipers than a full-size SUV or light truck. Trucks and SUVs often use heavier-duty components designed to handle greater loads and higher heat. Some vehicles use drum brakes on the rear axle, which rely on brake shoes instead of pads and require different service procedures.
Performance and luxury vehicles frequently use larger, ventilated rotors and multi-piston calipers. These systems dissipate heat better but cost more to service. Electric and hybrid vehicles use regenerative braking, which captures energy during deceleration and reduces wear on the friction brakes. That can extend pad life, but it also means the friction brakes may corrode from lack of use if they are not exercised periodically. Knowing your vehicle’s specific brake configuration helps you plan maintenance realistically.
Frequently Asked Questions
How much should a typical brake job cost?
Brake service pricing depends on your vehicle type, which components need replacement, and the parts you choose. A basic pad replacement costs less than a full job involving rotors, calipers, and fluid. Factors like ABS sensors, brake hardware, and labor rates also affect the total. Request a written estimate from a certified shop so you know exactly what you are paying for before any work begins.
How do I know if my brake pads need to be replaced?
Common signs of bad brake pads include squeaking, grinding, a soft or spongy pedal, vibrating during stops, and longer stopping distances. Many pads have wear indicators that produce a high-pitched squeal when friction material gets low. If you notice any of these symptoms, schedule a brake inspection right away. Ignoring them can damage rotors and calipers, turning a simple pad replacement into a much larger repair.
What is the difference between brake pad replacement and rotor resurfacing?
Brake pad replacement swaps out the friction material that presses against the rotor. Rotor resurfacing machines a thin layer off the rotor face to remove grooves and restore a smooth surface. Resurfacing is only possible if the rotor stays above its minimum thickness spec. If it measures too thin or shows cracks and heavy scoring, replacement is the safer option. A technician should always measure rotor thickness before deciding.
How long does a standard brake service take?
A basic pad replacement typically takes one to two hours per axle. Adding rotor replacement, fluid exchange, or caliper work can extend the visit to half a day. Many shops offer same-day brake service if you arrive early or schedule ahead. Ask whether your shop provides pickup and drop-off so you are not stuck waiting. That convenience matters when you rely on your vehicle daily.


Comments are closed